http://www.jboss.org/jbossas/downloads/
In this article, I'd like to show you how to set up WildFly 8 in domain mode and enable clustering so we get HA and session replication working among the nodes. It's a step-by-step guide so you can follow the instructions in this article and build the sandbox yourself ![]() .
.
Preparation & Scenario
Preparation
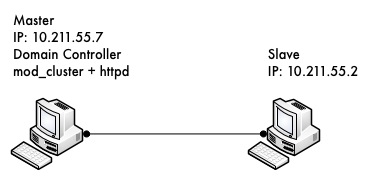
We need to prepare two hosts (or virtual hosts) to carry out the experiment. We will use the two hosts as follows:
-
Install Fedora 16 on them (other Linux versions are probably fine as well but I'll use Fedora 16 in this article)
-
Make sure that they are in same local network (subnet)
-
Make sure that they can access each other via different TCP/UDP ports (best to turn off the firewall and disable SELinux during the experiment or these will cause network problems)
Scenario
Here are some details on what we are going to do:
-
Let's call one host 'master' and the other 'slave'.
-
Both master and slave will run WildFly 8: master will run as domain controller, and slave will under the domain management of master.
-
Apache httpd will be run on master, and in httpd we will enable the mod_cluster module. The WildFly 8 on master and slave will form a cluster and be discovered by httpd.
-
We will deploy a demo project into domain, and verify that the project is deployed into both master and slave by domain controller. Thus we will see that domain management provide us a single point to manage the deployments across multiple hosts in a single domain.
-
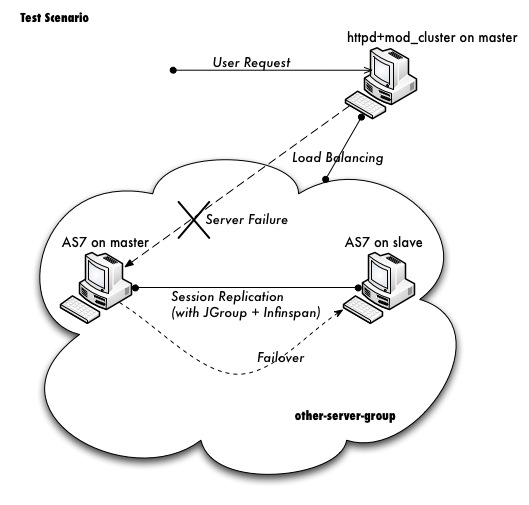
We will access the cluster URL and verify that httpd has distributed the request to one of the WildFly host. So we could see the cluster is working properly.
-
We will try to make a request of the cluster, and if the request is forwarded to master, we then kill the WildFly process on master. After that we will go on making requests of the cluster and we should see the request forwarded to slave without the session being lost. Our goal is to verify that HA is working and sessions are replicated.
-
After the previous step has finished, we reconnect the master by restarting it. We should see the master is registered back into the cluster, and we should also see slave recognising master as domain controller again and connect to it.
Please don't worry if you cannot digest so many details currently. Let's move on and you will get the points step by step.
Download WildFly 8
First we should download WildFly 8 from the website:
The version I downloaded is JBoss AS 7.1.0.CR1b, please don't use the version prior to this one, or you will meet this bug when running in clustering mode:
https://issues.jboss.org/browse/AS7-2738
After download finished, I got the zip file:
jboss-as-7.1.0.CR1b.zip
Note: The name of your archive will differ slightly due to version naming conventions.
Then I unzipped the package to master and try to make a test run:
unzip jboss-as-7.1.0.CR1b.zip
cd jboss-as-7.1.0.CR1b/bin
./domain.sh
If all is well, we should see WildFly successfully start in domain mode:
jboss-as-7.1.0.CR1b/bin$ ./domain.sh
=========================================================================

  JBoss Bootstrap Environment

  JBOSS_HOME: /Users/weli/Downloads/jboss-as-7.1.0.CR1b

  JAVA: /Library/Java/Home/bin/java

  JAVA_OPTS: -Xms64m -Xmx512m -XX:MaxPermSize=256m -Djava.net.preferIPv4Stack=true -Dorg.jboss.resolver.warning=true -Dsun.rmi.dgc.client.gcInterval=3600000 -Dsun.rmi.dgc.server.gcInterval=3600000 -Djboss.modules.system.pkgs=org.jboss.byteman -Djava.awt.headless=true

=========================================================================
...

[Server:server-two] 16:59:55,870 INFO  [org.jboss.as] (Controller Boot Thread) JBoss AS 7.1.0.CR1b "Flux Capacitor" started in 2499ms - Started 148 of 214 services (64 services are passive or on-demand)
Now exit master and let's repeat the same steps on slave. Once we get WildFly 8 running on both master and slave, we can move on to the next step.
Domain Configuration
Interface config on master
In this section we'll set up both master and slave to run in domain mode, and configure master to be the domain controller.
First open the host.xml in master for editing:
vi domain/configuration/host.xml
The default settings for interface in this file are:
<interfaces>
    <interface name="management">
        <inet-address value="${jboss.bind.address.management:127.0.0.1}"/>
    </interface>
    <interface name="public">
       <inet-address value="${jboss.bind.address:127.0.0.1}"/>
    </interface>
    <interface name="unsecured">
       <inet-address value="127.0.0.1" />
    </interface>
</interfaces>
We need to change the address to the management interface so slave can connect to master. The public interface allows the application to be accessed by non-local HTTP, and the unsecured interface allows remote RMI access. My master's IP address is 10.211.55.7, so I change the config to:
<interfaces>
    <interface name="management"
        <inet-address value="${jboss.bind.address.management:10.211.55.7}"/>
    </interface>
    <interface name="public">
       <inet-address value="${jboss.bind.address:10.211.55.7}"/>
    </interface>
    <interface name="unsecured">
       <inet-address value="10.211.55.7" />
    </interface>
</interfaces>
Interface config on slave
Now we will set up the interfaces on slave. First we need to remove the domain.xml from slave, because slave will not act as domain controller and it will operate under the management of master. I just rename the domain.xml so it won't be processed by WildFly:
mv domain/configuration/domain.xml domain/configuration/domain.xml.move
From JBoss AS 7.1.Final you don't need to rename domain.xml anymore.
Then let's edit host.xml. Similar to the steps on master, open host.xml first:
vi domain/configuration/host.xml
The configuration we'll use on slave is a little bit different, because we need to let slave connect to master. First we need to set the hostname. We change the name property from:
<host name="master" xmlns="urn:jboss:domain:1.1">
to:
<host name="slave" xmlns="urn:jboss:domain:1.1">
Then we need to modify the domain-controller section so slave can connect to master's management port:
<domain-controller>
   <remote host="10.211.55.7" port="9999"/>
</domain-controller>
As we know, 10.211.55.7 is the IP address of master.
Finally, we also need to configure interfaces section and expose the management ports to the public address:
<interfaces>
    <interface name="management">
        <inet-address value="${jboss.bind.address.management:10.211.55.2}"/>
    </interface>
    <interface name="public">
       <inet-address value="${jboss.bind.address:10.211.55.2}"/>
    </interface>
    <interface name="unsecured">
       <inet-address value="10.211.55.2" />
    </interface>
</interfaces>
10.211.55.2 is the IP address of the slave. Refer to the domain controller configuration above for an explanation of the management, public, and unsecured interfaces.
It is easier to turn off all firewalls for testing, but in production, you need to enable the firewall and allow access to the following ports: TBD
Security Configuration
If you start WildFly on both master and slave now, you will see that slave cannot be started, with following error:
[Host Controller] 20:31:24,575 ERROR [org.jboss.remoting.remote] (Remoting "endpoint" read-1) JBREM000200: Remote connection failed: javax.security.sasl.SaslException: Authentication failed: all available authentication mechanisms failed
[Host Controller] 20:31:24,579 WARN  [org.jboss.as.host.controller] (Controller Boot Thread) JBAS010900: Could not connect to remote domain controller 10.211.55.7:9999
[Host Controller] 20:31:24,582 ERROR [org.jboss.as.host.controller] (Controller Boot Thread) JBAS010901: Could not connect to master. Aborting. Error was: java.lang.IllegalStateException: JBAS010942: Unable to connect due to authentication failure.
This is because we haven't properly set up the authentication between master and slave. Now let's work on it:
Master
In the bin directory there is a script called add-user.sh. We'll use it to add new users to the properties file used for domain management authentication:
./add-user.sh

Enter the details of the new user to add.
Realm (ManagementRealm) :
Username : admin
Password : 123123
Re-enter Password : 123123
The username 'admin' is easy to guess
Are you sure you want to add user 'admin' yes/no? yes
About to add user 'admin' for realm 'ManagementRealm'
Is this correct yes/no? yes
Added user 'admin' to file '/home/weli/projs/jboss-as-7.1.0.CR1b/standalone/configuration/mgmt-users.properties'
Added user 'admin' to file '/home/weli/projs/jboss-as-7.1.0.CR1b/domain/configuration/mgmt-users.properties'
As shown above, we have created a user named 'admin' whose password is '123123'. Then we add another user called 'slave':
./add-user.sh

Enter the details of the new user to add.
Realm (ManagementRealm) :
Username : slave
Password : 123123
Re-enter Password : 123123
About to add user 'slave' for realm 'ManagementRealm'
Is this correct yes/no? yes
Added user 'slave' to file '/home/weli/projs/jboss-as-7.1.0.CR1b/standalone/configuration/mgmt-users.properties'
Added user 'slave' to file '/home/weli/projs/jboss-as-7.1.0.CR1b/domain/configuration/mgmt-users.properties'
We will use this user for slave host to connect to master.
Notice that the username must be equal to the name given in slave's host element. This means that you need a user for each additional host.
In newer versions of WildFly, the add-user.sh script will let you choose the type of the user. Here we need to choose the 'Management User' type for both the 'admin' and 'slave' accounts:
./add-user.sh   What type of user do you wish to add?
 a) Management User (mgmt-users.properties)
 b) Application User (application-user.properties)
 (a):
Slave
On slave we need to configure host.xml for authentication. We should change the security-realms section as following:
<security-realms>
   <security-realm name="ManagementRealm">
       <server-identities>
           <secret value="MTIzMTIz="/>
       </server-identities>
       <authentication>
           <properties path="mgmt-users.properties" relative-to="jboss.domain.config.dir"/>
       </authentication>
   </security-realm>
</security-realms>
We've added server-identities into security-realm, which is used for authenticating the host when slave tries to connect to master. Because slave's host name is set to 'slave', we should use the 'slave' user's password on master. In the secret value property we have 'MTIzMTIz=', which is the Base64 code for '123123'. You can generate this value by using a base64 calculator such as the one at http://www.webutils.pl/index.php?idx=base64.
Then in the domain controller section we also need to add the security-realm property:
<domain-controller>
   <remote host="10.211.55.7" port="9999" security-realm="ManagementRealm"/>
</domain-controller>
So the slave host could use the authentication information we provided in 'ManagementRealm'.
Dry Run
Now everything is set for the two hosts to run in domain mode. Let's start them by running domain.sh on both hosts. If everything goes fine, we can see from the log on master:
[Host Controller] 21:30:52,042 INFO [org.jboss.as.domain] (management-handler-threads - 1) JBAS010918: Registered remote slave host slave
That means all the configurations are correct and two hosts are running in domain mode now as expected. Hurrah!
Deployment
Now we can deploy a demo project into the domain. I have created a simple project located at:
https://github.com/liweinan/cluster-demo
We can use the git command to fetch a copy of the demo:
git clone git://github.com/liweinan/cluster-demo.git
In this demo project we have a very simple web application. In web.xml we've enabled session replication by adding following entry:
<distributable/>
And it contains a jsp page called put.jsp which will put the current time into a session attribute called 'current.time':
<%
    session.setAttribute("current.time", new java.util.Date());
%>
Then we can obtain this value using get.jsp:
The time is <%= session.getAttribute("current.time") %>
It's an extremely simple project but it could help us to test the cluster later: we will access put.jsp from the cluster and check that the request is distributed to master, then we disconnect master and access get.jsp. We should see the request is forwarded to slave but the 'current.time' value is held by session replication. We'll cover this in more detail later.
Let's go back to this demo project. Now we need to create a war from it. In the project directory, run the following command to get the war:
mvn package
It will generate cluster-demo.war. Then we need to deploy the war into domain. First we should access the http management console on master (because master is acting as domain controller):
http://10.211.55.7:9990
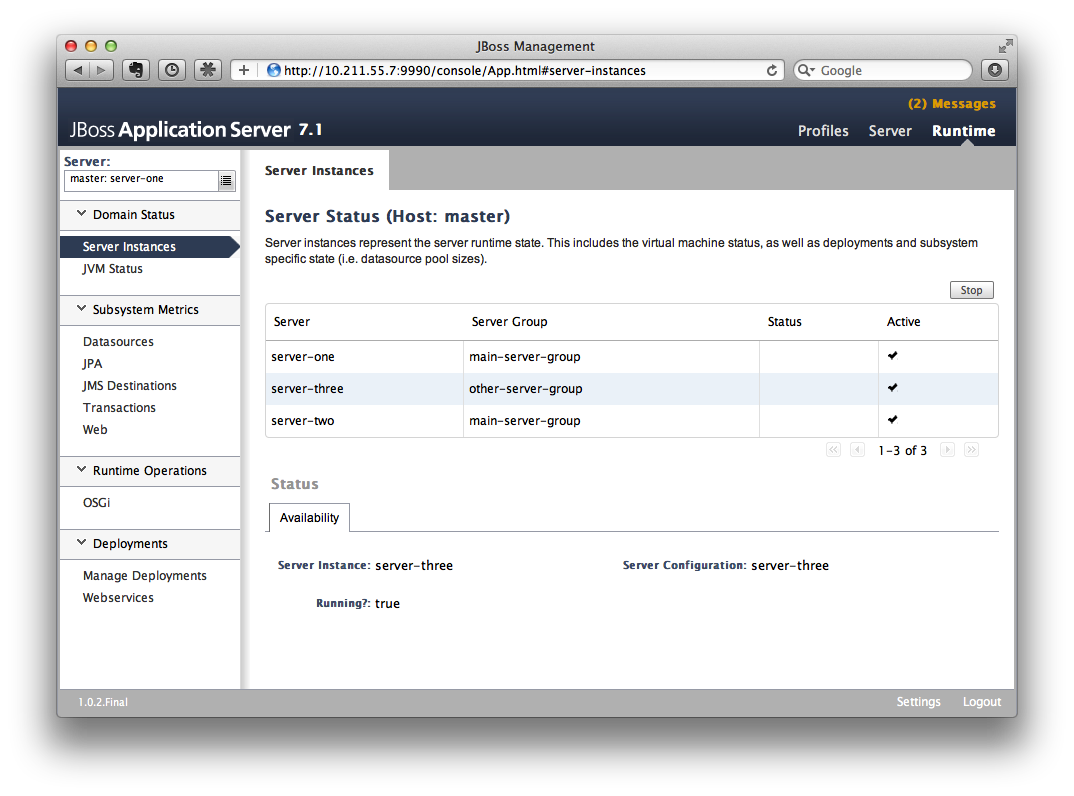
It will prompt you for an account name and password. We can use the 'admin' account we added a short while ago. After logging in we see the 'Server Instances' window. By default there are three servers listed, which are:
-
server-one
-
server-two
-
server-three
We can see that server-one and server-two have the status 'running' and that they belong to main-server-group; server-three has the status 'idle', and belongs to other-server-group.
All these servers and server groups are set in domain.xml on master as7. What we are interested in is the 'other-server-group' in domain.xml:
<server-group name="other-server-group" profile="ha">
   <jvm name="default">
       <heap size="64m" max-size="512m"/>
   </jvm>
   <socket-binding-group ref="ha-sockets"/>
</server-group>
We can see that this server-group is using the 'ha' profile, which then uses the 'ha-sockets' socket binding group. It enables all the modules we need to establish the cluster later (including infinispan, jgroup and mod_cluster modules). So we will deploy our demo project into a server that belongs to 'other-server-group', so 'server-three' is our choice.
In newer versions of WildFly, the profile 'ha' changes to 'full-ha':
<server-group name="other-server-group" profile="full-ha">
Let's go back to the domain controller's management console:
http://10.211.55.7:9990
Now server-three is not running, so let's click on 'server-three' and then click the 'start' button at the bottom right of the server list. Wait a moment and server-three should start.
Now we should also enable 'server-three' on slave: from the top of the menu list on the left-hand side of the page, we can see that we are currently managing master. Click on the list, select 'slave', then choose 'server-three'. We are now on the host management page for slave.
Then repeat these steps on master to start 'server-three' on slave.
server-three on master and slave are two different hosts; their names can be different.
After server-three on both master and slave are started, we will add our cluster-demo.war for deployment. Click on the 'Manage Deployments' link at the bottom of left menu list.
We should ensure that server-three is started on both master and slave.
After the enter 'Manage Deployments' page, click 'Add Content' at the top right-hand corner. Then choose the cluster-demo.war, and follow the instructions to add it into our content repository.
Now we can see cluster-demo.war is added. Next we click the 'Add to Groups' button and add the war to 'other-server-group' and then click 'save'.
After a few seconds, the management console will say that the project is deployed into 'other-server-group'.:
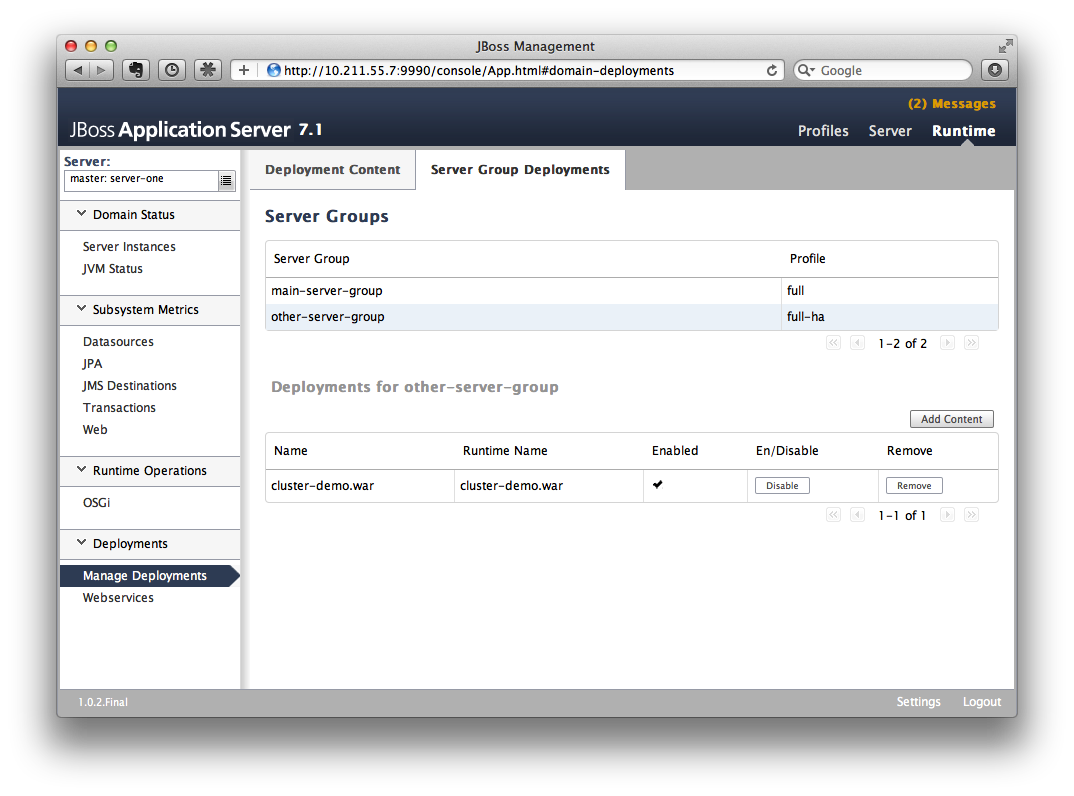
Please note that we have two hosts participating in this server group, so the project should be deployed in both master and slave now - that's the power of domain management.
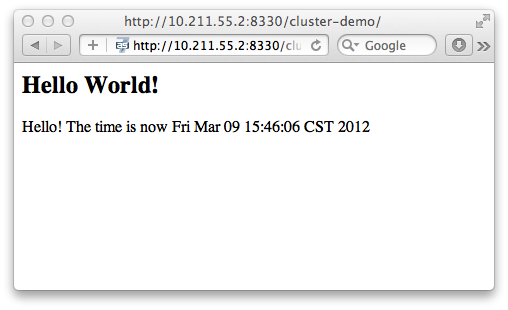
Now let's verify this, trying to access cluster-demo from both master and slave:
http://10.211.55.7:8330/cluster-demo/
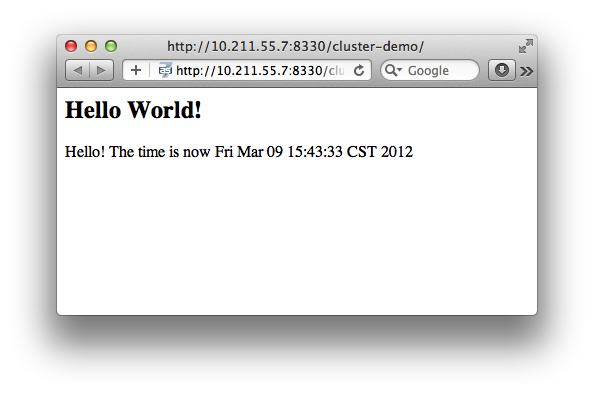
http://10.211.55.2:8330/cluster-demo/
Now that we have finished the project deployment and seen the usage of the domain controller, we will then use these two hosts to establish a cluster ![]()
Why is the port number 8330 instead of 8080? This has to do with the port-offset property of socket-bindings. Check host.xml on both master and slave:
<server name="server-three" group="other-server-group" auto-start="false">
    <!-- server-three avoids port conflicts by incrementing the ports in
         the default socket-group declared in the server-group -->
    <socket-bindings port-offset="250"/>
</server>
The port-offset is set to 250, so 8080 + 250 = 8330
Now we quit the WildFly process on both master and slave. We have some work left to do on the host.xml configurations. Open host.xml on master, and make some modifications to the servers section:
<server name="server-three" group="other-server-group" auto-start="false">
    <!-- server-three avoids port conflicts by incrementing the ports in
         the default socket-group declared in the server-group -->
    <socket-bindings port-offset="250"/>
</server>
to:
<server name="server-three" group="other-server-group" auto-start="true">
    <!-- server-three avoids port conflicts by incrementing the ports in
         the default socket-group declared in the server-group -->
    <socket-bindings port-offset="250"/>
</server>
We've set auto-start to true so we don't need to enable it in the management console each time WildFly restarts. Now open slave's host.xml, and modify the server-three section:
<server name="server-three-slave" group="other-server-group" auto-start="true">
    <!-- server-three avoids port conflicts by incrementing the ports in
         the default socket-group declared in the server-group -->
    <socket-bindings port-offset="250"/>
</server>
Besides setting auto-start to true, we've also renamed the 'server-three' to 'server-three-slave'. We need to do this because mod_cluster will fail to register the hosts with same name in a single server group, due to a name conflict.
After finishing the above configuration, let's restart the two as7 hosts and examine the cluster configuration.
Cluster Configuration
We will use mod_cluster + apache httpd on master as our cluster controller here. WildFly 8 has been configured to support mod_cluster out of box, so it's the easiest way.
The WildFly 8 domain controller and httpd don't have to be on same host. But in this article they are all installed on master for convenience.
First we need to ensure that httpd is installed:
sudo yum install httpd
And then we need to download newer version of mod_cluster from its website:
http://www.jboss.org/mod_cluster/downloads
The version I downloaded is:
http://downloads.jboss.org/mod_cluster/1.1.3.Final/mod_cluster-1.1.3.Final-linux2-x86-so.tar.gz
Jean-Frederic has suggested using mod_cluster 1.2.x, since1.1.x is affected by CVE-2011-4608.
With mod_cluster-1.2.0 you need to add EnableMCPMReceive in the VirtualHost.
Then we extract it into:
/etc/httpd/modules
Then we edit httpd.conf:
sudo vi /etc/httpd/conf/httpd.conf
We should add the modules:
LoadModule slotmem_module modules/mod_slotmem.so
LoadModule manager_module modules/mod_manager.so
LoadModule proxy_cluster_module modules/mod_proxy_cluster.so
LoadModule advertise_module modules/mod_advertise.so
Note that we should comment out the proxy_balancer_module:
#LoadModule proxy_balancer_module modules/mod_proxy_balancer.so
This is because it will otherwise conflict with the cluster module. And then we need to make httpd listen on the public address so we can perform the testing. Because we installed httpd on master host, we know its IP address:
Listen 10.211.55.7:80
Then we do the necessary configuration at the bottom of httpd.conf:
# This Listen port is for the mod_cluster-manager, where you can see the status of mod_cluster.
# Port 10001 is not a reserved port, so this prevents problems with SELinux.
Listen 10.211.55.7:10001
# This directive only applies to Red Hat Enterprise Linux. It prevents the temmporary
# files from being written to /etc/httpd/logs/ which is not an appropriate location.
MemManagerFile /var/cache/httpd

<VirtualHost 10.211.55.7:10001>

  <Directory />
    Order deny,allow
    Deny from all
    Allow from 10.211.55.
  </Directory>


  # This directive allows you to view mod_cluster status at URL http://10.211.55.4:10001/mod_cluster-manager
  <Location /mod_cluster-manager>
   SetHandler mod_cluster-manager
   Order deny,allow
   Deny from all
   Allow from 10.211.55.
  </Location>

  KeepAliveTimeout 60
  MaxKeepAliveRequests 0

  ManagerBalancerName other-server-group
  AdvertiseFrequency 5

</VirtualHost>
For more details on mod_cluster configuration please see this document:
http://docs.jboss.org/mod_cluster/1.2.0/html/Quick_Start_Guide.html
Testing
All being well, we can start the httpd service:
service httpd start
Now we access the cluster:
http://10.211.55.7/cluster-demo/put.jsp
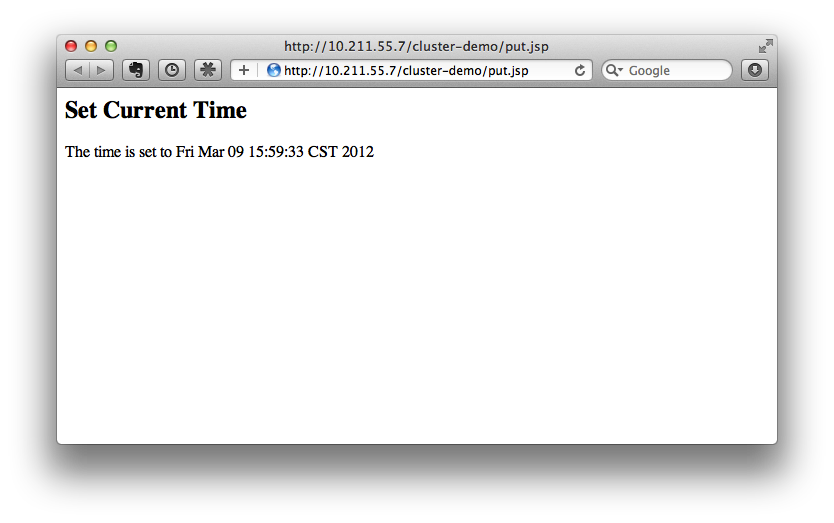
We should see from the WildFly log that the request is distributed to one of the hosts (master or slave). In this instance, the request is sent to master:
[Server:server-three] 16:06:22,256 INFO [stdout] (http-10.211.55.7-10.211.55.7-8330-4) Putting date now
Now I disconnect master by using the management interface. Select 'runtime' and the server 'master' in the upper corners.
Select 'server-three' and click the stop button. The active icon should change.
Killing the server by using system commands will cause the Host-Controller to restart the instance immediately!
After a few seconds, access the cluster:
http://10.211.55.7/cluster-demo/get.jsp
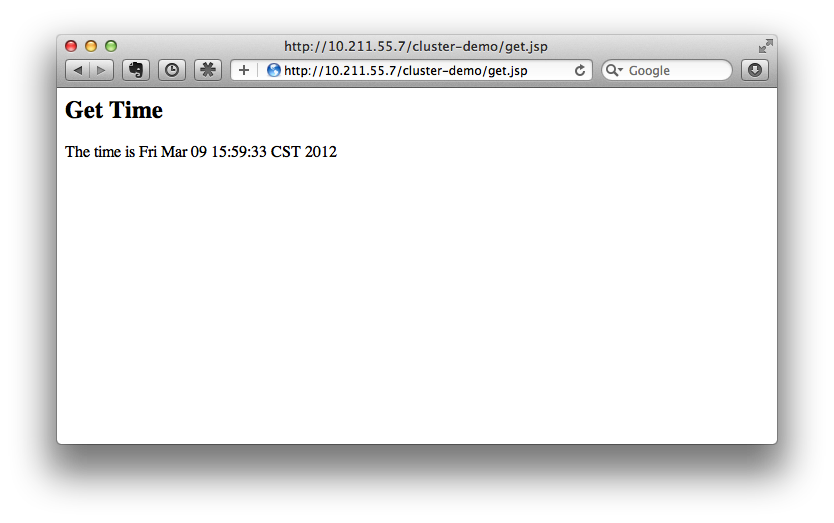
Now the request should be served by slave, which should see borne out in slave's log:
[Server:server-three-slave] 16:08:29,860 INFO [stdout] (http-10.211.55.2-10.211.55.2-8330-1) Getting date now
And from get.jsp we should see that the time returned is the same gathered by 'put.jsp'. Thus it's proven that the session has correctly replicated to slave.
Now we restart master and should see that the host is registered back to the cluster.
It doesn't matter if you found the request is sent to slave the first time. In that case, just disconnect slave and perform the same test: the request should be sent to master instead. The point is that we should see the request redirected from one host to another and the session is maintained.
Special Thanks
Wolf-Dieter Fink has contributed the updated add-user.sh usages and configs in host.xml from 7.1.0.Final.
Jean-Frederic Clere provided the mod_cluster 1.2.0 usage.
Misty Stanley-Jones has given a lot of suggestions and helps to make this document readable.